Español  |
English  |
MariaDB Installation
Install MariaDB on Linux
As we cannot cover the installation on all Linux distributions, in this document we will explain how to install MariaDB on Ubuntu and derivative systems. If you have a different Linux distribution, you may have to adapt the commands to your system.
To start with the installation of MariaDB open a terminal, and in the terminal run the following command:
sudo apt install mariadb-server
MariaDB installation will start
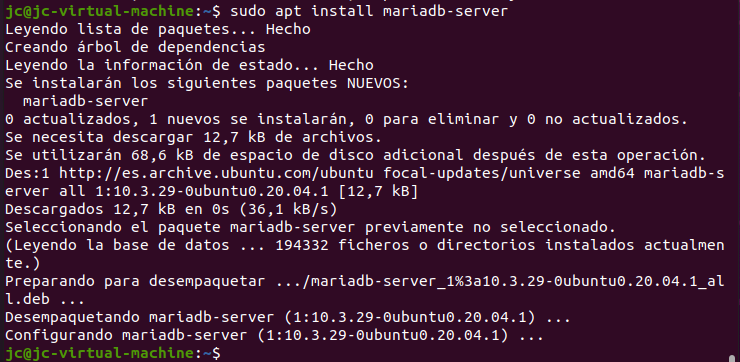
Once the installation is complete, to secure the MariaDB installation, run the following command:
sudo mysql_secure_installation
The following message will appear when executing the command.

After the first message, the password of the root user is requested. This is the password for the root user of MariaDB, not the root user of the operating system. Since we have not yet set a password for this user, it will be blank. Press Enter without typing anything to continue.
A new message appears asking if we want to set a password for the root user.

Type Y or press Enter to set the password. Type the password twice. This password may not actually be necessary because, by default, MariaDB is configured to use sockets identification, which does not use user passwords.
Below are a series of questions related to MariaDB security. It is best to answer Y to all of them (or just press Enter).
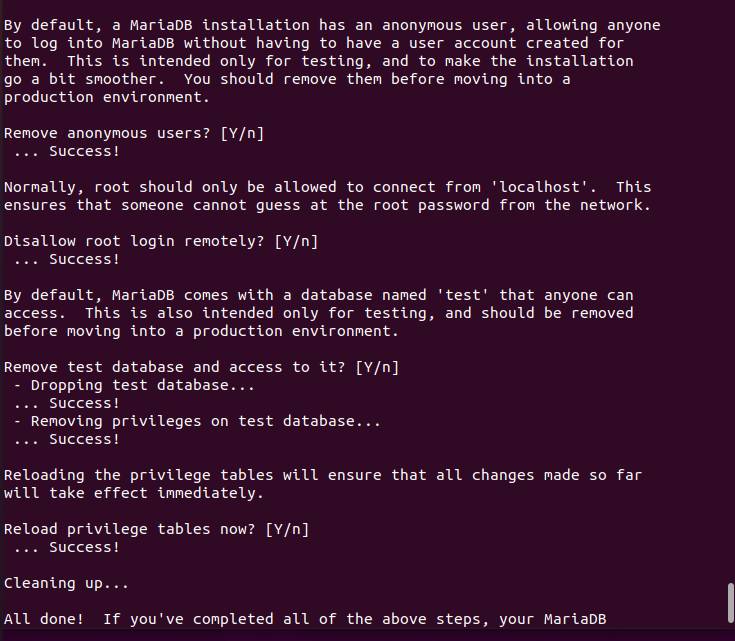
Once the program is finished we will have our MariaDB installation a little more secure.
Although I had promised not to have to deal with SQL commands, due to the identification system by sockets, to be able to connect to the MariaDB server, we need to configure a user with administrator permissions. Don’t worry, we will have to do this only once.
In a terminal screen, type:
sudo mariadb
When you press Enter, after a welcome message, the MariaDB [(none)]> prompt appears, indicating that you are now in the MariaDB terminal.

To be able to connect to MariaDB from places other than this terminal, we need to create a user and grant it the necessary permissions.
First we create the user and its password. Type the following command and press Enter; you can replace the username admin with any name of your choice, of course you must change the password password with another password. The single quotes surrounding the username and password are part of the command, so you must type them. Note that the command ends with a semicolon (;).
create user 'admin' identified by 'password';
If everything is correct, the message Query OK will appear followed by the number of affected rows, in this case 0.

Next we will give all permissions on all databases to the created user; that is, we are going to create an administrator user, with all possible permissions. Type the following command, then press Enter.
grant all on *.* to 'admin' with grant option;
Again, if everything is correct, the message Query OK will appear.

To ensure that the permissions are effective immediately, type the following command, then press Enter.
flush privileges;

Now, to finish, type the following command to exit the MariaDB terminal, after the command press Enter.
exit;
We will return to the Linux terminal.

This completes the installation and configuration of MariaDB. Remember the username and password configured in these last steps as they will be needed to connect to MariaDB from LibreOffice.
Configuring MariaDB to display messages in other languages
Like almost all databases, including the built-in LibreOffice databases, MariaDB displays error messages in English, but can be configured to display messages in Spanish. To do this you need to modify, if it exists, a file called my.cnf. If the file does not exist, it must be created.
The my.cnf file is a plain text file, without formatting. It is usually located in the /etc/mysql/ folder.
- Open the my.cnf file with your preferred editor, for example, in a terminal type:
sudo nano /etc/mysql/my.cnf - If the file already exists, search for the [mariadb] section, if not found, add a line with the text (including square brackets):
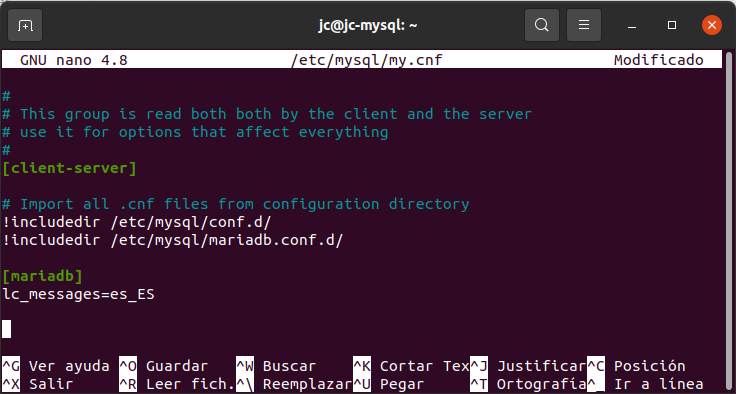
[mariadb] - In the [mariadb] section add the following line (change es_ES to the code of the desired language):
lc_messages=es_ES - The my.cnf file should look like this image:
- Close the file and save the changes.
- Restart the MariaDB server for the changes to take effect by running the following command in a terminal:
sudo systemctl restart mariadbFrom now on, MariaDB error messages should be displayed in English.
Install MariaDB on Windows
Download MariaDB from the official download page https://mariadb.org/download/.
Once the installer is downloaded run it. A welcome page will appear first.
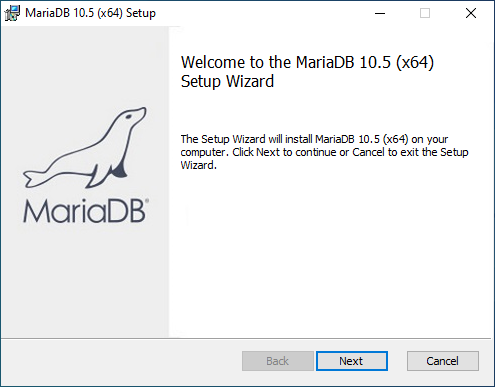
Click on Next.
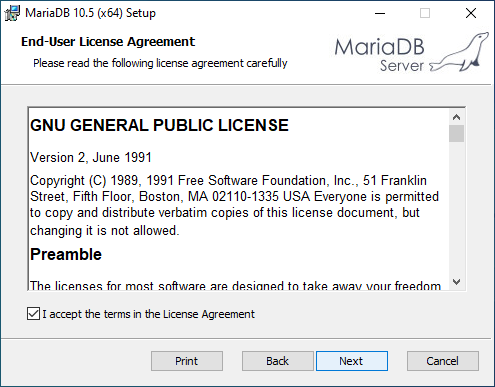
The license is shown below, you must check the option I accept the termns in the License Agreement and clic on Next.
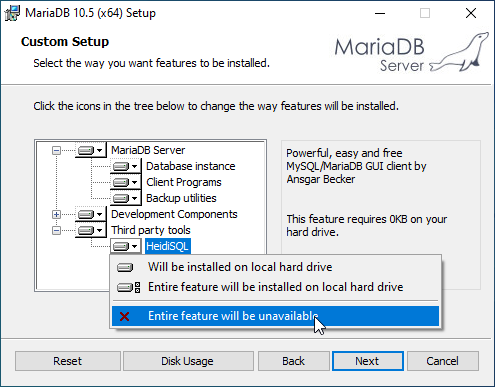
If you wish, in Third party tools you can select the option Entire feature will be unavailable to not install the HeidiSQL program, we will not need it. Click Next.
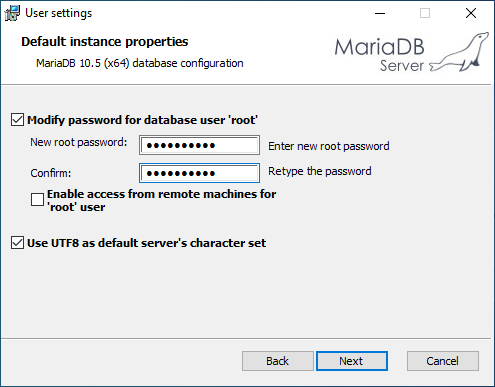
On the next screen, leave Modify password for database user ‘root’ checked and type a password, repeat the password in the next text box. Remember the password, as you will need it later. In this step you should also check the option Use UTF8 as default server’s character set. For added security, leave the Enable access from remote machines for ‘root’ user option unchecked. Click Next.
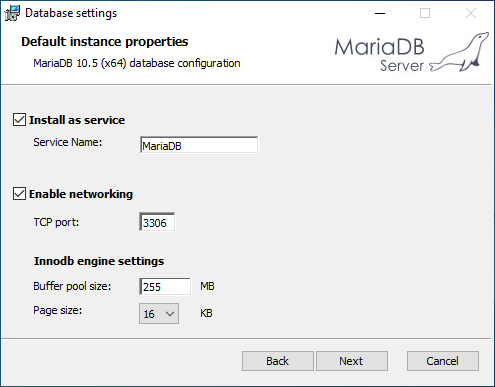
If you have no reason to do so, leave everything as it is in the instance configuration screen. Click Next.
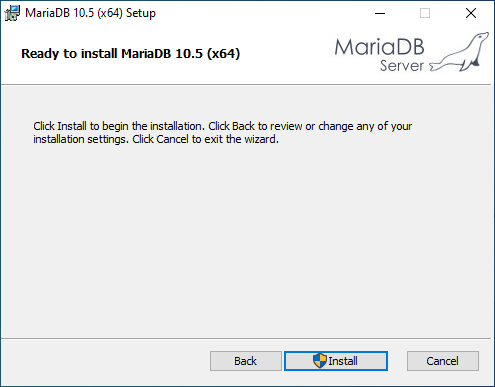
You are now ready to start the installation. Click on Install, a Windows confirmation window will appear, accept to continue with the installation.
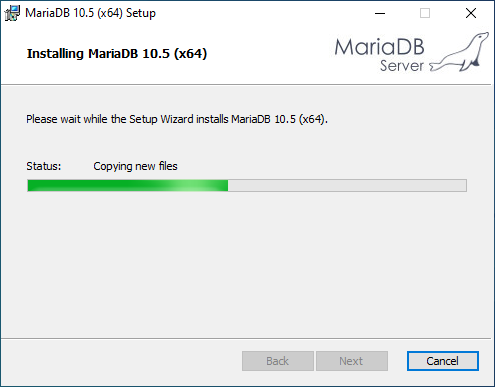
The installation will start.
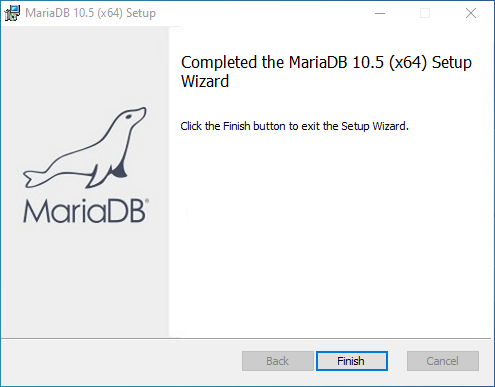
When the installation is complete, a window appears informing you that the installation is complete. Click Finish to finish the installation.
Configuring MariaDB to display messages in other languages
Like almost all databases, including the built-in LibreOffice databases, MariaDB displays error messages in English, but can be configured to display messages in other languages. To do this you need to modify a file called my.ini, if it exists. If the file does not exist, it must be created.
The my.ini file must be a plain text file, without formatting. It can be created or modified with Notepad. It can be located in several places, but in our experience, it is best to place it in the MariaDB data folder, usually located in “C:\Program Files\MariaDB XX.Xdata”. To configure the file:
- Using the file explorer navigate to “C:\Program Files\MariaDB XX.Xdata”.
- If you do not have file extensions visible, in the file browser menu select View and check the File name extensions option.
- If the my.ini file does not exist, create it:
- Right-click on an empty place in the folder.
- From the pop-up menu select New > Text Document.
- Rename the file to my.ini (type the name in lowercase).
- Open the my.ini file by double-clicking on it.
- If the file already exists, look for the [mariadb] section and if you cannot find it or you have just created the file add a line with the text (including the square brackets):
[mariadb]
- In the [mariadb] section add the following line (change es_ES to the code of the desired language):
lc_messages=es_ES - The my.ini file should look like this image:
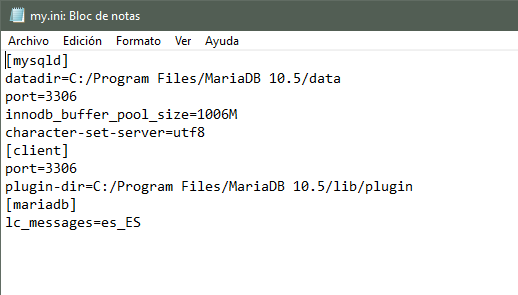
- Close the file and save the changes.
- Restart the MariaDB service, or restart the computer, for the changes to take effect.
From now on, MariaDB error messages should be displayed in Spanish.
| < Introduction | Index | EasyMariaDB help index | Install the extension > |